Preparing for the Neonatal Resuscitation Program NRP Skills
Understanding how to carry out appropriate Neonatal Resuscitation is an essential skill for every single Obstetrical healthcare provider.
For these reasons, many hospitals require that healthcare providers who come into contact with the mother and child dyad obtain the American Academy of Pediatrics Neonatal Resuscitation Program or NRP certification. Being entrusted by parents to provide care for their newly born baby is both a privilege and an extraordinary responsibility. Therefore, nurses, midwives, doctors, respiratory therapists and other auxiliary staff should acquire additional evidence-based education regarding current women’s, children’s and neonates health practices.
To enhance the chances of an optimal outcome in case of an emergency healthcare providers must be ready for every possibility.
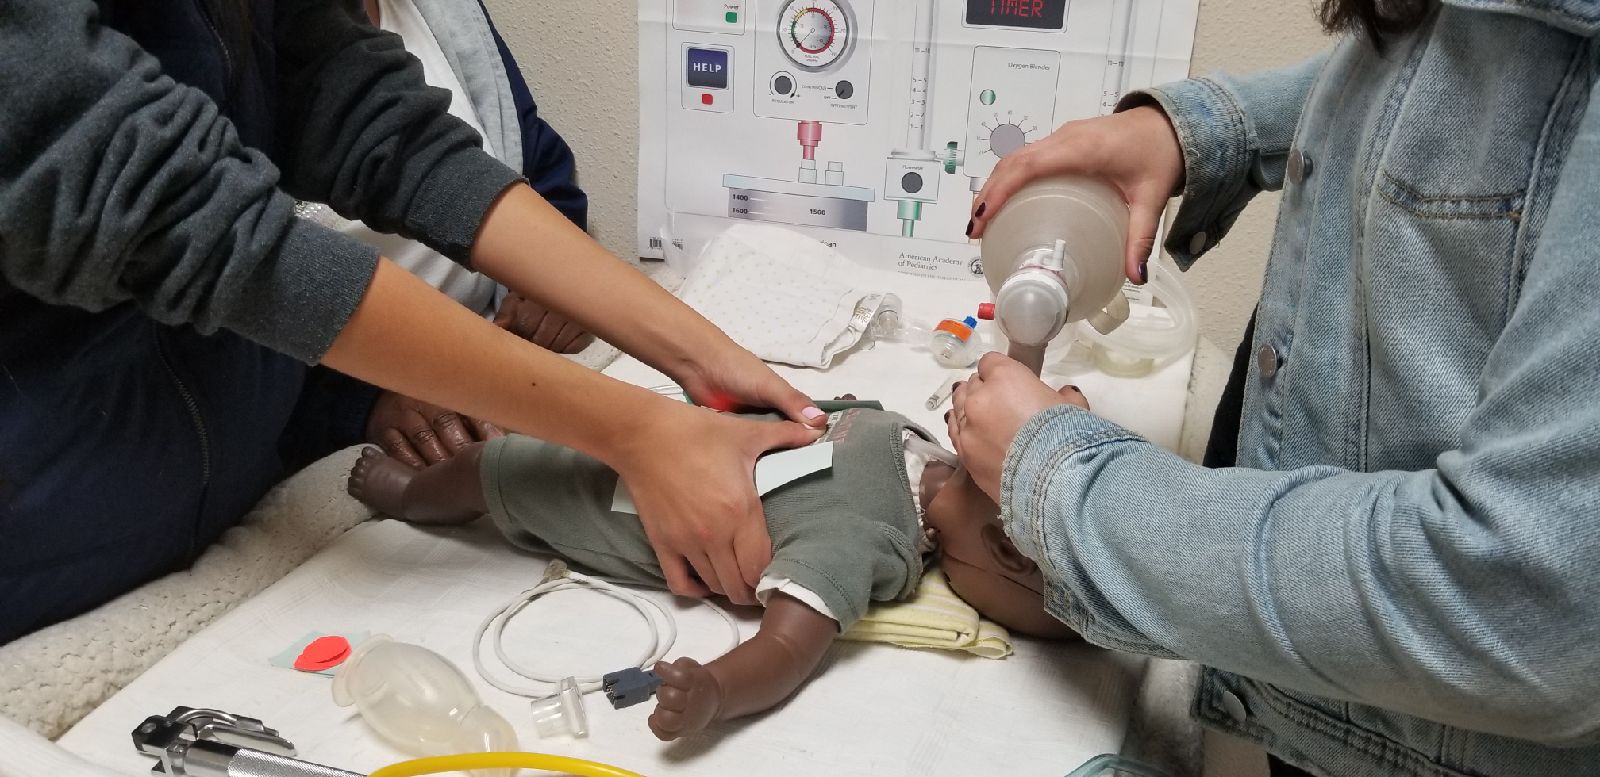
Firstly, prior to a delivery members of the Obstetrical multidisciplinary-care team, which comprises of Labor and Delivery, Postpartum and NICU personnel, including you the RN reading this article, must secure the proper equipment needed to resuscitate an infant. These include: turning on the radiant warmer, setting the FIO2 to 21%, assessing the manometer, turning on the suction, securing airway supplies plus equipment and etc. Furthermore, it is equally important to know the techniques of successful Positive Pressure Ventilation with the Flow-inflating Bag, the Self-Inflating Bad, or the T-Piece Resuscitator.
Additionally, a newborn admitted to the NICU will require an IV site. Not to mention, it is also common knowledge that the infant will need blood drawn for a Blood Gas and CBC with Differential. The equipment required to draw labs, initiate an IV, implement drug therapies and provide supplemental oxygen should be available beforehand for the resuscitation team to accomplish. To emphasize, if all equipment is ready and available, the infant admission will not only be efficient, but the sick or premature infant will not be compromised.
Next, knowing what to do and when to do it as part of a team is the key to effective Neonatal Resuscitation.
It is essential to know what to do if an infant is apneic or gasping. Healthcare providers should be adept on how to determine the infant’s heart rate and how to respond to changing heart rates. If the heart rate is less than 60 beats per minute the team must begin chest compressions. On the other hand if the heart rate is greater than 60, but no greater than 100 then providers must continue to provide bag mask ventilation at 1 breath every 3 to 5 seconds. Anyone attending the birth must know when to call for Endotracheal Intubation as well as how to confirm appropriate tube placement. Last but not least, the NRP provider must know what medications to provide if the heart rate remains low including the dose and route of Epinephrine administration.
NRP Skills Step by Step Guide
Click here to view our article on How to do NRP Skills Step by Step Guide.
To clarify, the American Academy of Pediatrics Neonatal Resuscitation Program (NRP) emphasizes the importance of effective team dynamics during the resuscitation of an infant of premature baby. Every effective team requires teamwork, leadership and communication. The team leader must allocate attention wisely and use situational awareness. The team members must have a clear understanding of their roles and responsibilities. For more information regarding the 7th edition NRP guidelines please refer to the American Academy of Pediatrics Neonatal Resuscitation (NRP) Seventh Edition Textbook.
Prior to a delivery prepare the following:
- Blankets to dry and stimulate the infant.
- For neonates prepare a plastic wrap and hat to maintain heat.
- Pulse oximeter to determine saturation.
- Suction equipment and a bulb syringe to suction the mouth then the nose.
- The scales should be ready to quickly weigh the infant.
- Temperature sensor.
- 3 Lead EKG and ECG monitor.
- If these things are not ready, your resuscitation will be compromised.
Next prepare the Advanced Airway equipment to include:
- Several size ET tubes.
- Laryngoscope with a bright light bulb.
- Airway adjuncts such as the OPA and NPA.
- laryngeal mask airway LMA.
In addition, obtain the proper to equipment to:
- Insert a peripheral IV and start IV fluids.
- Draw a CBC/Diff.
- Get a Blood Sugar.
- Draw a blood culture.
- Insert a UAC line and replace the UVC line. Have the catheters available for the physician to choose. When the physician begins the insertion technique it is usually started with the UVC.
- A ribbon is placed around the cord and loosely tied with one knot and one knot only.
- Later, the physician may want it tightened or loosened and it would be difficult to accomplish if there is a tight knot.
- The umbilical cord clamp is removed.
- The physician uses forceps to spread the UV prior to insertion of the catheter.
- Before the insertion, the physician has determined the depth of the catheter.
- The depth should be placed so that the tip is inserted to the level of L3-L4.
- The physician will secure this catheter by securing it to the Warton’s Jelly with a stitch.
- If needed, the physician may want to cannulate the Umbilical Artery. (one of the Umbilical Arteries)
- Again he has determined how far this catheter will be placed.
- The depth should be placed so that the tip is inserted T7-T8.
- T6 = you need to fix
- T7 = you’re in heaven
- T8 = is great
- T9 = is fine.
- This UAC is then stitched to the Wharton’s Jelly to secure it in place.
- The physician now hands you the Umbilical Artery with one hand and hands the Umbilical Vein with the other hand. He states “this is the Artery and this is the Vein”
- You must tag these two catheters.
- If you tag them wrong, you will compromise the infant.
- An x-ray is ordered to confirm the proper placement.
- Sometime the catheters are pulled back for proper placement.
- Another X-ray is ordered.
- When confirmed, your job becomes busy.
- You stabilize the catheters to keep them safe.
- This is referred to as “goal posting.”
- You must note the number at which the catheter is inserted.
- This placement must be checked daily to determine if the catheters have migrated or withdrawing.
- You then need to attach these catheter ends to IV fluids.
- The fluids need heparin added.
- Heparin, a blood anticoagulant, is frequently added to central line fluids to prevent catheter occlusion by thrombus formation.
- Heparin is supplied in different concentrations, therefore, each time heparin vials are opened, the nurse must double check that the correct concentration is selected.
- The correct concentration is:
- 1:1000 units/1 ml
- To prepare a 250 ml bag:
- Draw up 0.25 ml of heparin from a heparin solution of 1:1000.
- Add this to the bag of 250 ml of NS
- This yields a concentration of 1 unit of heparin/1 ml of solution.
- If you use the wrong concentration or mix the solutions inappropriately, the infant will be compromised.
- A ribbon is placed around the cord and loosely tied with one knot and one knot only.
Watch the speed zones
- It’seasy to draw fluids and return fluids from the UAC to quickly and the outcome can be detrimental.
- Withdrawing 2.5 ml of blood from a high position UAC over 40 seconds will prevent cerebral hemoglobin desaturation, whereas, withdrawing the with the same volume of blood in 20 seconds results in cerebral hemoglobin desaturation.
- Returning fluid volume into a UAC at a rate of o.5 ml per five seconds prevents retrograde aortic blood flow and elevation of blood pressure.
- Whereas, retrograde aortic blood flow and elevation of blood pressure were observed when faster return times were used.
- Withdrawing and administering fluid to fast will compromise the infant.